Thursday, 11 August 2011

Post 16 - Death Animations & Walk Tweaks


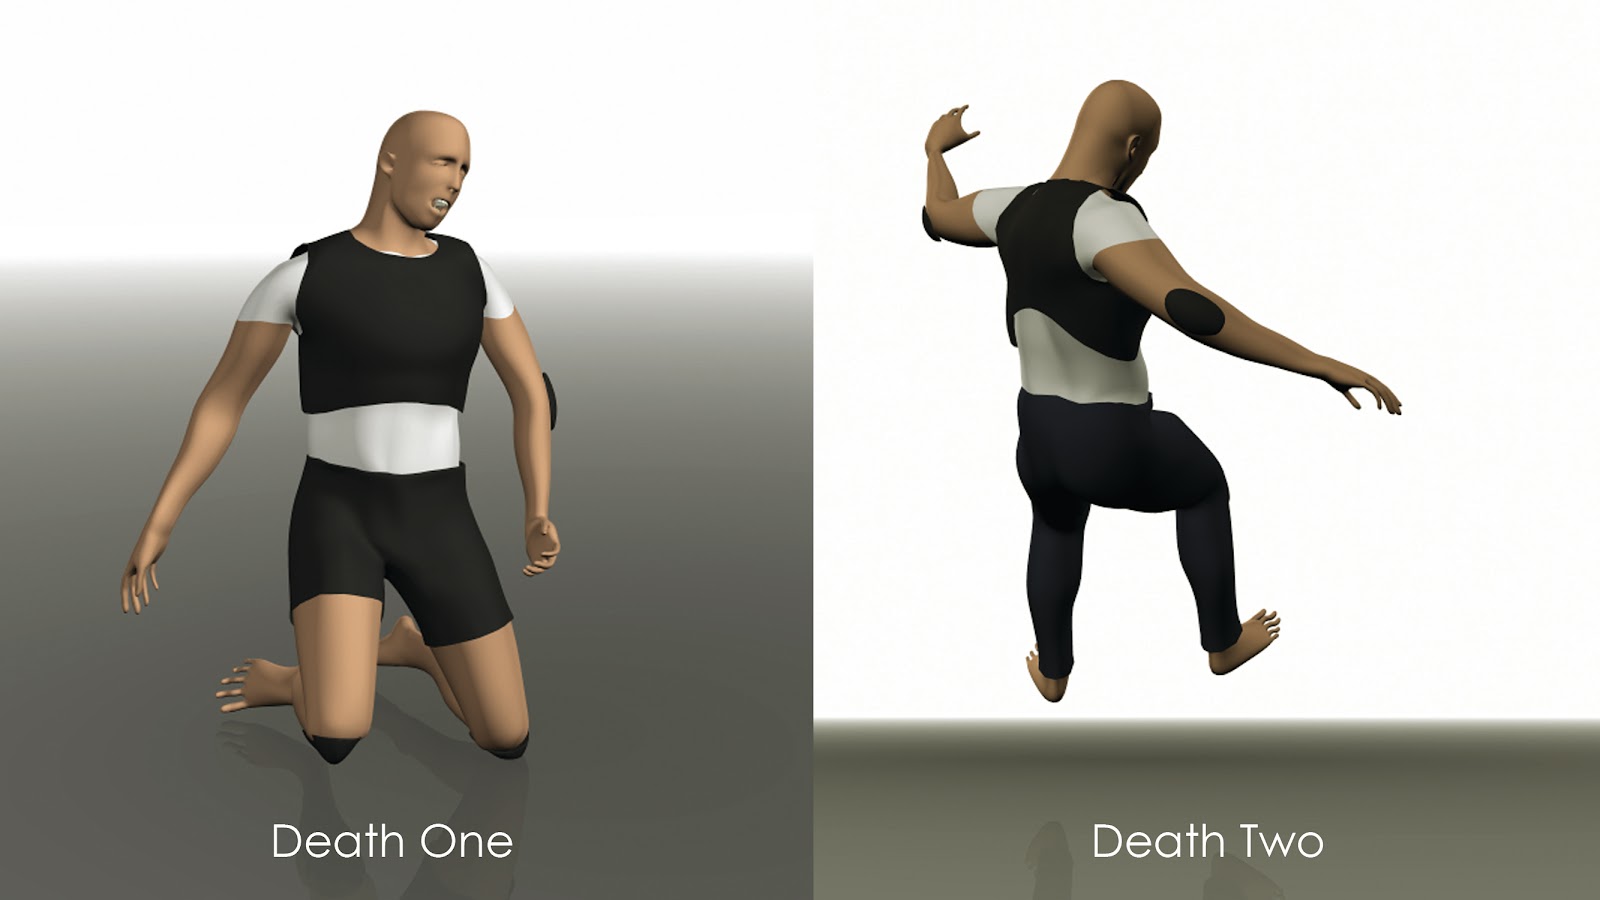
Its been a couple of weeks since my last post, but I have now completed another two animation sequences. These are called 'Death One' and Death Two.


Death One features the character being struck on the shoulder / side and consequently falling to his knees and ending face down on the floor. This animation features all of the usual animation techniques such as staggering actions, weights distribution and 'bouncing limbs' (i.e. limbs responding as they should to hitting a surface and continue to move/bounce). As my work is becoming more and more challenging, I am now looking more closely at some of the gaming references I mentioned in earlier posts (namely Resident Evil 5 and Halo Reach).


On top of this, I am now in the habit of recording myself acting out particular sequences. Both death sequences were created initially from looking at these recordings. Below are links to the sequences and below them are the other walk cycles, which I have now improved, using Joe's feedback.


Some of the things which have been tweaked include the following:


- Lighting stripped down
- Static 'two-point' camera set-up introduced
- Upper body motion toned down
- Regular walk hips and head/neck staggered


'NEW' Death One - LINK
'NEW' Death Two - LINK
Walk Cycle 2nd PassLINK
Minor Injury Walk Cycle 2nd PassLINK
Severe Injury Walk Cycle 2nd Pass - LINK

Post 15 - 'Severe injury' walk + Feedback update

I have just finished creating the 'severe injury' walk cycle. I used the same principles as that of the previous cycles. The main difference is that as the walk is very much asymmetrical, the middle/ opposite position is more like two thirds into the cycle. This is to create the idea of a limp and that not much weight could be taken on the left foot. I think that this does work, but the head and neck have been difficult to get right. Some other changes I have begun to make include adding an orbiting camera, plus some spotlights as a harsh shadow was being cast when under default lighting.


I rendered these, uploaded them onto my YouTube channel and emailed my contact (for feedback).


He gave some good advice on looking carefully at the fundamentals and provided me with some links to the animation mentor website. I was lucky enough to have another contact, who also agreed to give me some feedback / tips: Joe Deucher; Technical Artist currently working for Rare in Derby. I sent him the same links to which he responded with some great feedback and a breakdown for each cycle.


Some key points that picked up on includes:


- Over exaggeration of head & upper body
- Flow: pause/stutter on the first walk cycle
- Symmetrical movement: break it up with more offsets and 'leading stride'

He also said that the orbiting cameras and the extra spot lights weren't necessary and a simple multi angle approach would be much more appropriate. So the first thing that I have done is to remove these extra elements and to deal with adding in cameras in the next few weeks. There were many other aspects and areas of improvement he pointed out and I found the response to be very detailed and constructive. The next step is to start work on the death sequences (two in total). These will be done at the same time as tweaks to the first walk cycles are established.


Severe injury walk - LINK


Thursday, 21 July 2011

Post 14 - 'Relaxed' and 'minor injury' walk


Here are the first two animation cycles I have made. These were created using the pose-to-pose method as shown in the Gnomon Workshop DVD on animation fundamentals. I first created the beginning, middle and end poses. Then I blocked out the passing / in-between positions. These were created using the stepped tangent mode allowing for a clear understanding of the scene. Once happy with the timing and the poses, the tangents were converted into clamped / curved splines. Then, tweaks using the Graph Editor were made; keys were deleted and new keys made.


I am happy with both animations so far as they demonstrate a sense of weight distribution/balance and in the injury walk cycle some good offset limbs, as well as a delayed head spine. These have now been saved to the Trax Editor and so now I am going to begin work on the third cycle (major injury). This one will require another look at my game examples and maybe even some video reference of myself acting it out.


I also wanted to make an update on the progress on the Unity game engine. I have tried a couple of tests for importing the rig into it. These however didn't go so well. First off, the mesh when imported becomes distorted around the shoulders (although the animation does get imported). However, I have decided that I will not be pursuing this aspect into my project. The main reasons for this are:


1. I have very little experience with Unity and trying to use it effectively would take time away from animating and have an adverse effect on the quality.


2. Additionally, as the cycle motions would be the most likely sequences to import, it would (in my opinion) appear incomplete or missing parts of the project as the majority of it would be of death or assassination sequences which wouldn't make sense to then allow the player to make the character die. This seems to be a bit controversial and so for these reasons, I am focusing on animation and pipeline development.


Walk LINK
Minor Injury LINK

Post 13 - Work In Progress Presentation + marks


Today I had my work in progress presentation. All other animation students giving their presentations also were present and we each viewed each other's work. I gave my presentation using the web application Prezi. I feel that this went well. I broke down what I was going to cover and described the processes the project has gone through up until now. The main areas described were as follows:


  • Updated project title and aim
  • Breakdown of cycles and sequences (as described in post 07)
  • Research resources sort after and used
  • Software decisions (Maya and it's tools)
  • Asset modelling
  • Rig troubles and development processes
  • Up to date and detailed timeline from now until the project hand in

I believe that the proposed timeline and project goals are realistic and achievable.


RESULTS

About a week later, I received the marks for the work in progress presentation. I received 16 out of 20 (approx 80% out of 100%). I am very pleased with this result. The feedback was very reassuring, with particular interest in the structure and the timeline that I proposed. This has given me some confidence in what I am aiming to achieve. The next step is to follow the time plan as closely as possible (this can be seen towards the end of my presentation via the link).


Prezi - LINK

Sunday, 17 July 2011

Post 12 - Robin Butler Testing Agreement


I contacted Robin Butler (an Animator I wrote a case study on). I asked him if he would be willing to view my work and critique it. I've asked him to give feedback based on:


Quality of the sequence/s
How you would improve upon it
Suitability for video-game use (any changes needed to make them sufficient)

He agreed to help and I said that I would provide them in the form of YouTube links as and when they are finished. He suggested that it would be a good idea to try and get the animations into Unity 3d (a freeware game engine). This would be a great thing to do and think that if there is time to investigate this it would be time well spent. However, at this stage I do feel that I need focus on the animation side. However, I have downloaded Unity 3D and time permitting I will see what I can do with in the near future.

On top of Robin's feedback, I intend to critique my sequences myself. Hopefully the feedback that Robin will provide can then be used to improve and tweak the animations.


Robin Butler's website - LINK

Saturday, 16 July 2011

Post 11 - Walk Cycle Mapping

A couple of weeks ago, I created a walk cycle using an earlier rig. I've decided to map this existing animation onto my newly established rig. This was achieved by consolidating all of the old rig's layers onto one layer and then importing it into the new rig's scene. This layer was then locked as a reference layer and the new rig was then animated using the stepped pose to pose method. Once this was done, the stepped tangents were changed into clamped tangents and mapped to minic the early animation. Once this was done, the odd layer/rig was removed and final tweaks and changes were performed.


As the clavicle control and other changes had been made, it was not an exact match. However, I am pleased with the results and have now saved this onto the Trax Editor. This required making a 'character set' of the rig. I also made a face sub character set, which encompasses the face. This means that any facial animations I make will be saved as a separate Trax animation and can be edited in the same way.  


I did come across a problem with Maya 2012 and that was that when a character set had been made, the Graph Editor could only show one curve at a time and not multiple ones. As I made a post on the CG Society, I got a response saying that it is a problem which Autodesk are currently working on. As I felt that this could be a major problem, I reverted back to Maya 2011. This was not a problem however, as all of the other tools I want to use are also part of the 2011 edition. 


Walk Cycle mapping - LINK 

Post 10 - Knife Modelling

Later on down the pipeline, I am aiming to create a few short combat sequences involving two figures. The weapon that I decided to try and use is a combat knife (as inspired by the Halo Reach Assassination sequences) I modelled the knife by using an image plane and importing placing a suitable knife template image. Then by using the 'Poly Modelling tool' in Maya, I traced the outline, then extruded and mirrored the handle to make it more 3 dimensional. I'm happy with the results and plan to use a series of key framed parented constraints. This will be tackled later on once I have finished the several initial cycles I stated I would create.


Original Image


Poly Model